
Have questions about the right Instax Mini 8 settings?
Are your Instax Mini 8 pictures too bright or too dark?
This article if for you...
You might think about a Polaroid camera as an old fashion device from the 70s, but the truth is that Polaroid cameras (also known as Instant Cameras) are making their comeback. More and more instant cameras have been launched to the market in the past few years, by various manufacturers, and the use of these cameras is becoming popular again, among kids as well as adults.
The brightness adjustment dial
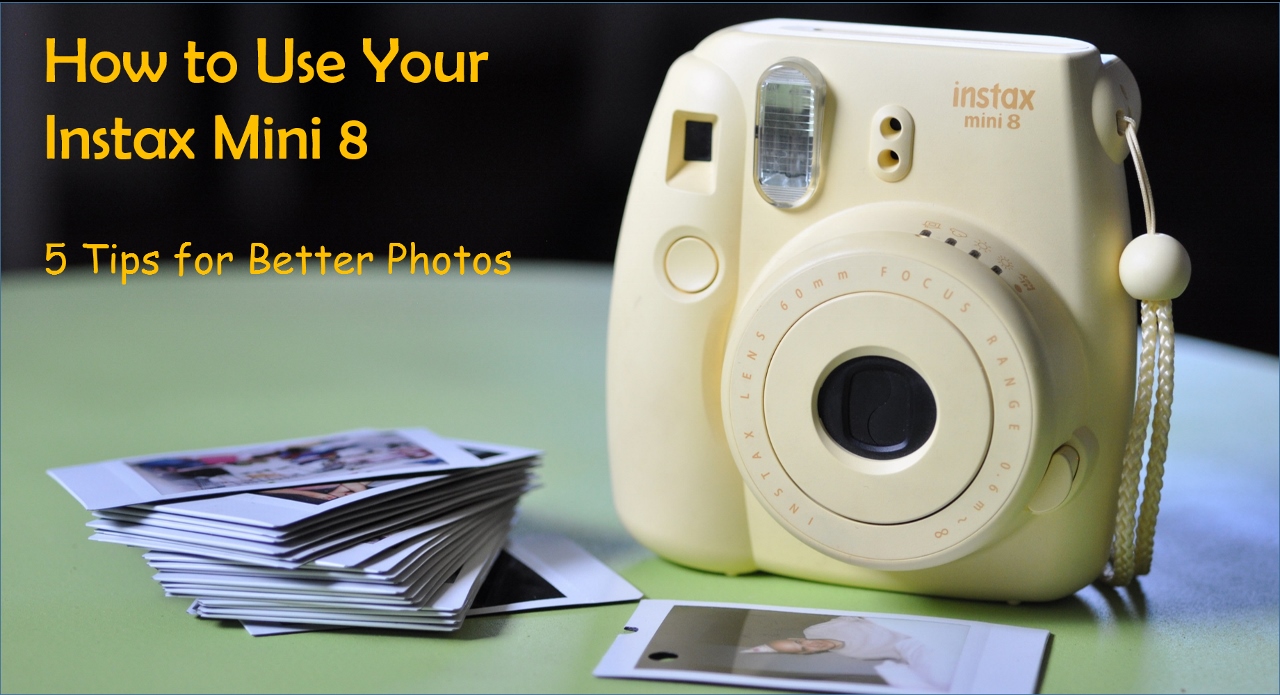
One of the most successful Polaroid / instant cameras, which is very popular among kids, is the FujiFilm Instax Mini 8. It's a basic, easy to use, point & shoot type camera, that takes instant photos and develops them like the good and old Polaroid cameras. If you or your kid already have the Instax Mini 8 and what you're looking for are some useful tips on how to use it, skip this part and go directly to the How to Use the Instax Mini 8 - 5 important Tips section below.
If you don't have it and you're considering buying it for your kid (or yourself), I'll take this opportunity and share with you its main advantages:
- The ability to see the results immediately, and therefore to learn photography from one shot to the other.
- The camera has all the basic features kids need in order to learn about photography.
- Its "photographer" look and feel – very important for a kid who's making the first steps in photography. What I mean is that the FujiFilm Instax Mini 8 is a real tangible camera – not a smartphone, not a sophisticated electronic device with displays and touch screens – its a camera. As a first camera for your kid, I find this is important. It looks and feels different, more real, due to being a Polaroid / Instant camera.
- The pictures are tangible. They aren't just files on your hard disk. And once they are processed, they are present – on the refrigerator door, on a photo collage, in your office. At some point, after taking a few dozen photos and like other toys you probably have at home, the photos are everywhere, and each time your kid bumps into it one, it sparks again the motivation to take more photos and thus improve the photography skills. You can never have this effect with digital photos (unless, of course, you print them, but nobody is printing all of their photos these days, right?)
How to Use the Instax Mini 8 - 5 Important Tips
As mentioned above, the Instax Mini 8 is very easy to use, but if you or your kid are asking yourselves how to take good pictures with the Instax Mini 8, why the pictures are too bright / dark, or any other question about the right Instax Mini 8 settings, the 5 important tips are for you (All tips are based on my 7 years old daughter's experience after taking more than 100 photos). After reading the tips, try to implement them in your next photography session, and I'm sure your photos will look much better:
Flash
when it comes to the Instax Mini 8 flash settings, the main thing to keep in mind is that the flash always fires. If you tried to take a few pictures indoors, you've probably noticed that the camera activates the flash automatically. However, as opposed to many other cameras, the user cannot turn it off. Take this into account when you take pictures indoors, and particularly – don't take photos of windows or any other reflecting surfaces. It will reflect back and harm the photo's quality. Impotant note - the flash is not the only factor that impacts the photos' brightness. If your pictures are too bright or too dark, pleae read carefully the 3rd tip below about Exposure Sensing and Setting.
Distance
the camera has a 60 mm f/12.7 lens and doesn’t have an auto-focus feature. As a result, its recommended shooting distance according to the manufacturer is 3 ft and up. In my experience, however, objects that are more than 20 ft from the camera will not be too vivid. So practically, the recommended shooting distance is 3 – 20 ft. In addition, take into account that the flash effective range is not more than 9 Ft. Thus pictures you take indoors of objects which are farther away will be dark.
Exposure Sensing and Setting
this is probably the most important tip in this How to Use the Instax Mini 8 list, with a huge impact on the photos quality and therefore on yours and your kid's satisfaction. Read it carefully, and find our how to avoid a situation where your Instax Mini 8 pictures are too bright or too dark.
Before getting into the details – if you are already familiar with exposure, shutter speed and how it works, you can skip this paragraph. Otherwise, read it carefully or learn more about it in the Basic Photography Terms post here.
Exposure and Shutter Speed are 2 out of the main 3 factors that impact the photo's quality. The Exposure is basically the amount of light passing into the lens and hitting the film. The more light, the brighter the picture. The Shutter Speed dictates how much time the shutter will be opened, in order to let the light pass through the camera and hit the film. The longer the speed, the brighter the picture. Most cameras these days, especially the professional ones, have a digital mechanism that sets both parameters automatically (professional cameras also have a manual mode which lets the photographer set the parameters as he wishes). The FujiFilm Instax Mini 8, however, is different: As mentioned above, it has a fixed shutter speed – 1/60 seconds, so the only thing that's left to set is the exposure. But…
The camera's mechanism doesn’t do it automatically, meaning it doesn't set the right exposure level based on the surrounding. It just recommends… So what you need to do is to follow the recommendation, or else – the photo will be too dark or too bright.
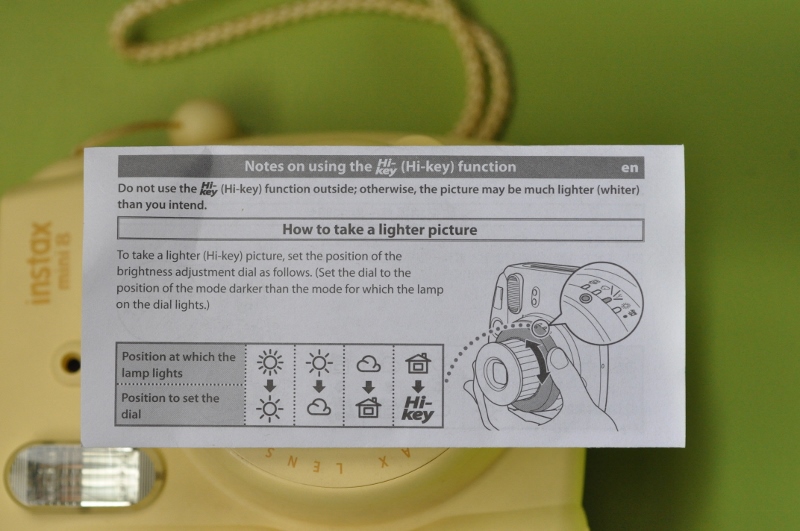
How does it work? before letting your kid shoot any photo, teach them to look at the dial. The camera informs you of the suitable setting by lighting the corresponding lamp. Ask your kid to turn the brightness adjustment dial to the position of the lit lamp.
After gaining some experience, your kid can make one step further, and set the exposure according to his desire. Before explaining how it works, let's review what the options are:
Indoors, Night – F12.7
Cloudy, Shade – F16
Sunny, Slightly Cloudy – F22
Sunny and bright – F32
Hi Key – for softer impression
Improve Your Instax Mini 8 Experience: 7 Essential Accessories
Now, you already know that in darker surroundings, the exposure will be longer – Indoors means more light (=longer exposure) than Cloudy, so: if the camera recommends on Cloudy, and your kid wants a brighter picture, he should adjust it to Indoors, and by that allowing more light into the lens. Makes sense? It may be confusing, but your kid can very easily get used to it. Alternatively, he can always follow the instructions attached to the camera manual, as seen in the picture below:
Teaching Photography to Kids: Selecting the Right Approach
Film Handling
Give the film enough time to process and dry. Make sure that your kid is patient enough and waits until the picture is ready. Drying time has a significant effect on picture quality. Keep the picture covered with a piece of paper, or turn it upside down and leave it alone. Don't touch it with your fingertips nor let your kid do that until it is fully processed, otherwise it may harm the photo's quality. To read more about the Instax film price, handling and other features, click here - Fujifilm Instax Mini 8 Film
Try the Camera
the last tip is a general one, aimed to help you and your kid experiment the camera while implementing the tips mentioned above. As you already know, the FujiFilm Instax Mini8 is a basic, analogue point and shoot film camera, which most of us are not used to anymore. One more aspect we are not used to anymore is the photo cost – each shot costs, and you cannot edit, change or just erase it. All of this emphasizes the benefits your kid can gain from trying it, experiencing the right use of flash, the proper distance and the exposure setting. Once you and your kid are familiar with the right way to use it, both of you will feel much more comfortable to use it widely, and above all – enjoy it!